Misfit Mods Wizard produces the best Kodi builds. For example Misfit Mods Lite, Khaos, Zodia, Samurai, Atomic and HardNox build. Now we are going to discuss how to install Atomic Kodi Build on 18 Leia and 17.6 Krypton.
For better navigation, it uses Atomic Bomb 17 Skin. The Atomic build comes with different types of add-ons that provide to watch the content from various categories. Those categories are Movies, TV shows, Eternal TV, Sports, Urban, Kids, Music, Horror, All in one, Fanfaves, System and Add-ons.
You can find this list of the add-ons while using the Atomic build like Neptune Rising, Oculus, Convent, Starz, Elysium, Bob Unleashed, The Piramid and more.
How To Install Atomic Kodi Build?
Before going to download thirty party sources on your Kodi, you need to enable to Unknown Sources option. Otherwise, you are unable to access this Kodi build. To enable, go to Settings >> System >> Addons >> Unkown Sources.
Here are the steps you need to follow to set up Atomic build:
Step #1: Go to “Settings” by clicking on the gear icon from the home screen.
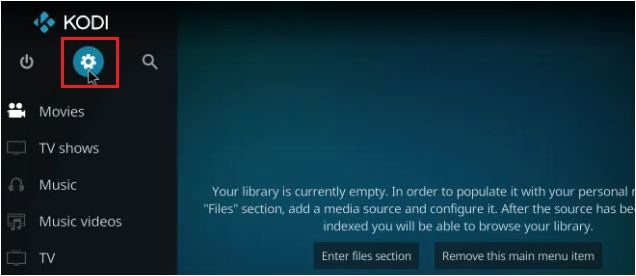
Step #2: Now click on the “File Manager”.
Step #3: From the File Manager, select the “Add Source” option in order to add a new file.
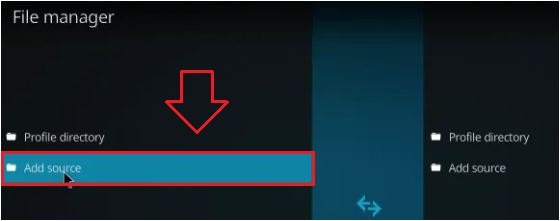
Step #4: Tap on the “None” option.

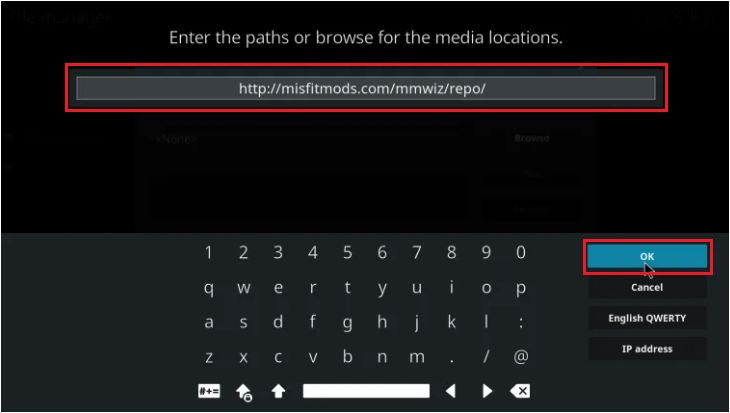
Step #5: Now enter this URL: “http://misfitmods.com/mmwiz/repo/” and then click on the “OK” button.
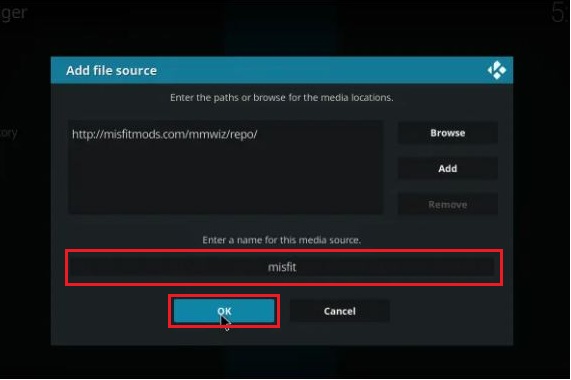
Step #6: Now enter the name “misfit” for this media source and then tap on the “OK” button.
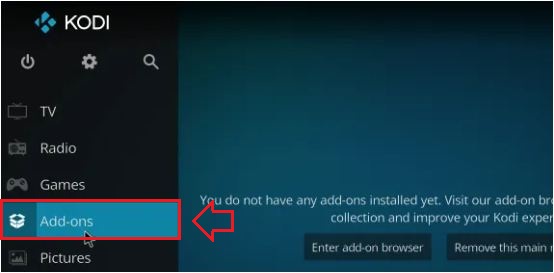
Step #7: From here, move to the home screen and then click on “Add-ons”.
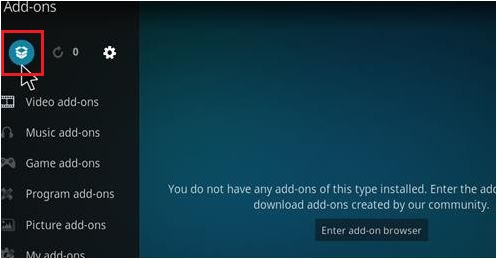
Step #8: In the Add-ons, you need to tap on the “Add-on browser” that you can find at the top left side.
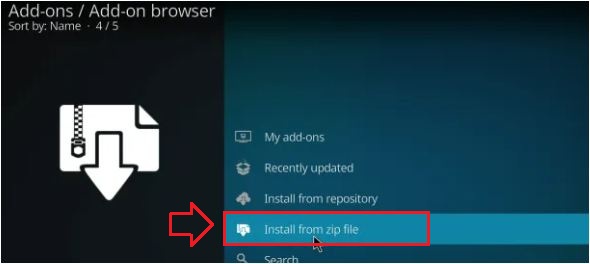
Step #9: From here, select the “Install from zip file” option from the list.
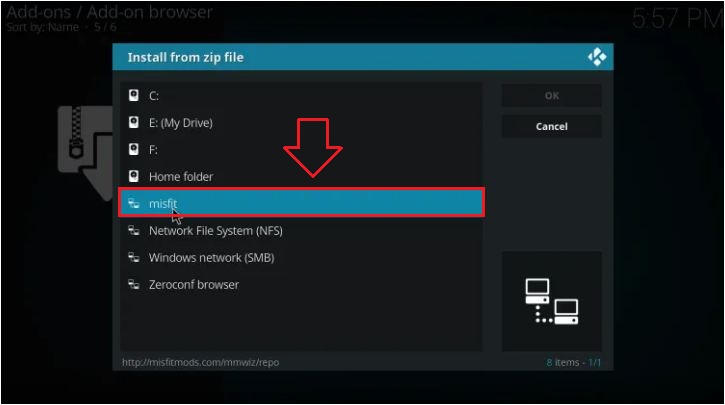
Step #10: A new windows will be open and then click on the source “misfit” which you added earlier.
Step #11: Now tap on the “plugin.program.misfitmods-1.7.zip”.

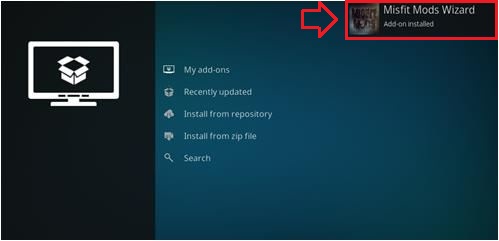
Step #12: After clicking on the zip file, you will get a notification on the top right side “Misfit Mods Wizard Add-on Installed”.
Step #13: Now a pop-up message will appear on the screen. Click on the Dismiss and then Continue and then Build Menu option.
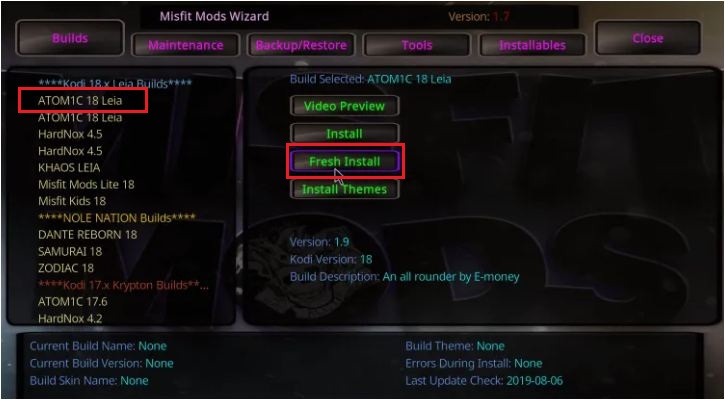
Step #14: Select “Atomic 18 Leia” from the Kodi 18 Leia Builds section. For Krypton, select “Atomic 17.6” from the Kodi Krypton Builds.
Step #15: After that, select the “Fresh Install” option.
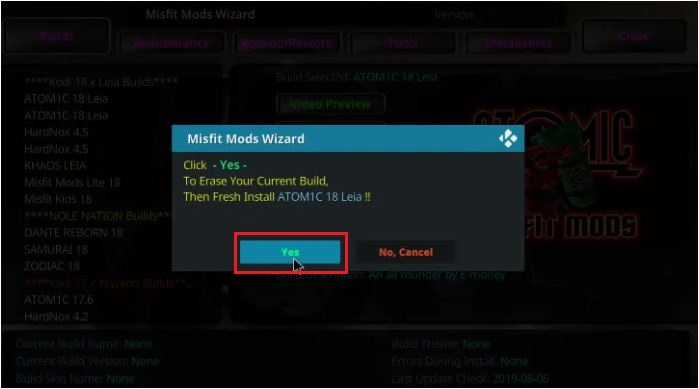
Step #16: Now a new pop-up window will be shown, click on the “Yes” button to install.
Step #17: When you click yes, the Atomic build will start downloading on your Kodi.
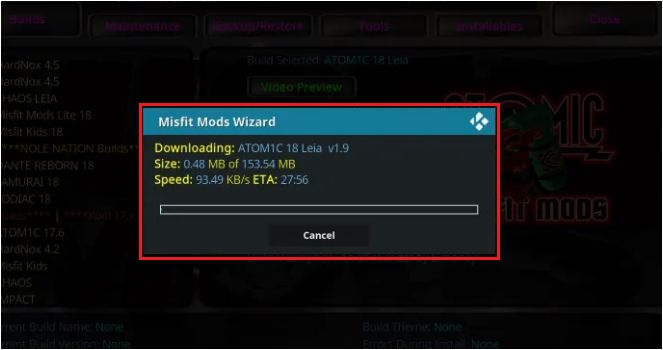
Step #18: Now just sit and relax. The atomic build will be downloaded in a couple of minutes and it will be installed on your Kodi.
Step #19: When the installation is completed, click the “Force Close” option and restart the Kodi.
Step #20: That’s it! Give some time to update Add-ons and menus.
To Conclude…
I hope you have successfully installed the Atomic build on your Kodi 18 Leia and Krypton 17.6 version. The user interface of the Atomic build is good and the media contents will be updated daily.
help installing my Kodi atomic build